Does it ever drive you crazy when your home feels like an oven in the summer and freezing in winter? Yes? Then you’re not alone. We all get tired of the uneven temperature of HVAC systems depending on particular climate needs, only leading to skyrocketing electricity bills with no comfort at all. But, it’s time to make a change for your comfort and peace of mind.
To maintain a comfortable temperature all year round with decreased energy bills, install a mini-split AC. Installing a mini-split ensures an effective cooling and heating solution for all your temperature problems while offering energy efficiency.
Usually, the traditional air conditioners need to be installed by professionals, but as they are ductless and don’t require much other than a pair of hands, a full day, complete mini-split installation instructions, and a bit of experience, mini-splits can be DIY installed. Here’s a complete guide about how to install a mini-split by yourself, with tools and materials breakdown that you might need during the procedure.
But before heading to the guidance on how to install a mini-split, it’s crucial to understand what is a mini-split and why they are beneficial. So let’s get into it.
Understanding Mini-Split AC:
What is a Mini-Split AC:
The mini-split air conditioner is a type of HVAC system that provides both cooling and heating solutions without ductwork depending on the individual’s needs. It is comprised of an outdoor unit and an indoor unit mounted on the wall and connected to the outdoor unit by a small conduit. Their ductless design feature makes them an ideal option for targeted climate controls and efficient temperature solutions.
It’s Advantages:
The advantages of mini-split air conditioners are many, but some of the main ones are:
- They are energy-efficient.
- They are easy to install and can be DIY installed with proper understanding and guidance.
- They ensure effective indoor air quality as they are ductless and reduce pollutants.
- They are designed to operate quietly, perfect for spaces where noise reduction is preferred.
- They offer flexibility and cool or heat the rooms and spaces that are difficult to, by the installation of multiple indoor units on a single outdoor unit.
Installation Preparation:
Before installing the mini-split air conditioner, it is necessary to ensure complete installation preparation. Here’s a breakdown of the tools and materials required for the installation, and the precautions you need to consider beforehand.
Tools and Materials Required:
You’ll need the following tools and materials for an accurate and effective mini-split installation:
- A drill
- Hole saw
- Wrench
- Level
- Screwdrivers
- Mounting brackets
- Refrigerant lines
- Electrical wiring ‘
- A conduit
Choose the Ideal Location:
The next thing to consider is choosing an appropriate location for your mini-split air conditioner’s outdoor and indoor units.
For Outdoor Unit:
The ideal location for the outdoor unit is a well-ventilated area without direct access to sunlight and heavy foot traffic.
For Indoor Unit:
The indoor unit should be placed on a higher and central spot on a wall, free from any obstruction. Knowing and understanding how to install split AC on the wall ensures effective operation for a longer time.
Ensure Safety Precautions:
For considering split-type aircon how to install, safety should be at the top of the list. Here are some safety precautions that you need to consider to prevent any mishap or damage.
- Turn off the power supply.
- Wear protective gloves or glasses for enhanced safety.
- Double-check all the connections.
- Follow complete manufacturer guidelines to avoid any damage.
How to Install a Mini-Split AC:
Here are the detailed steps on how to install a mini-split to ensure that you DIY install it efficiently. By following these steps appropriately and precisely, you’ll know how to install a split AC unit by yourself.
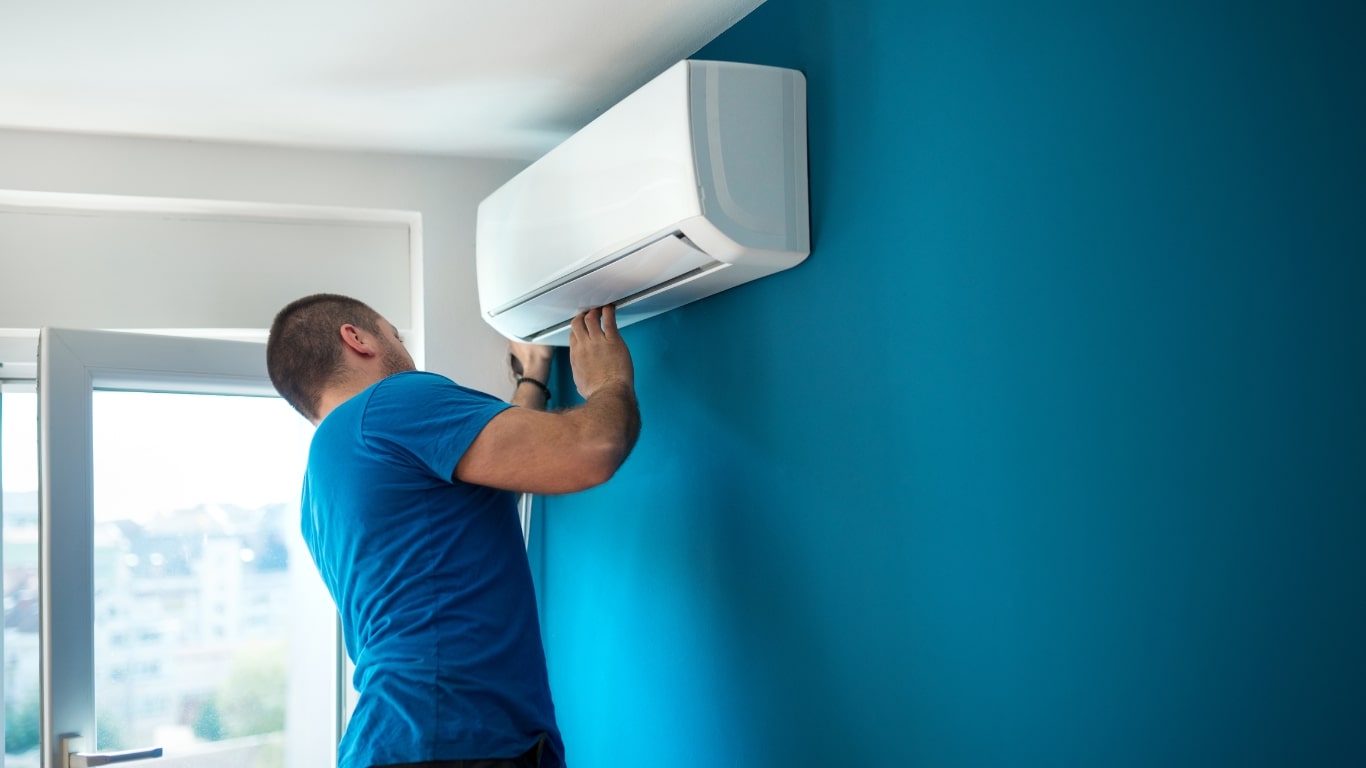
Install the Indoor Unit:
Begin with installing the indoor unit of the mini-split air conditioner. For the installation of the indoor unit, first, choose a higher and central location on a wall. Next, attach the mounting bracket to the wall by using a scale to make sure that it’s straight, using wall anchors and drilling holes if needed. Drill a hole of about 3 inches into the wall as a pathway for power cables, refrigerant lines, and drain hose, ensuring that the hole has a slight downward slope on the outside to clear the way for drainage. Now pass the refrigerant lines, power cable, and drain hose through the drilled hole and join them with the indoor unit. At last, hang the indoor unit on the mounting bracket, and make sure that it’s safe and secure.
Install the Outdoor Unit:
Now comes the installation of the outdoor unit, which begins with choosing a well-ventilated area that doesn’t have access to direct sunlight and heavy foot traffic. Make sure that the surface is solid and even, using the prefabricated concrete pad if required to level the surface to avoid any water damage. Now place the outdoor unit on the pad, ensuring to leave enough space around it for enhanced airflow and easy maintenance. Next is to connect the refrigerant lines from the indoor unit with the outdoor unit using a wrench for a secured and safe connection and to avoid any future leaks. Lastly, by considering the appropriate manufacturer’s wiring diagram, connect the power cables to the outdoor unit. Double-check all the connections to inspect flaws if any.
Set Up the Drainage System:
Now for setting up the drainage system, make sure that the indoor unit’s drain hose slopes slightly downward for proper water drainage. Use brackets or clips to secure the hose if needed. Direct the drain hose to an appropriate drainage point like a gutter or a pipe so that the end of the hose is not submerged in water. At last, perform a test by pouring some water into the unit’s drainage pan to see if it smoothly flows the the drainage hose.
This is the detailed procedure of how to install a mini-split all by yourself. Follow these steps appropriately for improved efficiency.
Inspect and Test:
Conduct a Vacuum Test:
Conduct a vacuum test for finalizing the installation by using a vacuum pump to get rid of all the moisture and air from the refrigerant lines to make sure that the system is clean.
Charge the Refrigerant:
Add the appropriate amount of the refrigerant to the system as instructed by the manufacturer.
Test for Proper Operation:
Turn on the system to check if it operates properly and smoothly, and cools and heats the room effectively without leaking or making any noise.
Maintenance Tips and Care of Mini-Split AC:
Regular Maintenance Tips:
Some of the regular maintenance tips that will save you time and money in the future are:
- Monthly clean or replace the air filters for optimal performance.
- Check the outdoor unit often to remove debris and dirt that could block the airflow.
- Examine refrigerant lines and connections often for leaks and blockages.
- Make sure that the drain hose is all clean and draining efficiently.
DIY Manage Common Problems:
- Problem: Is the unit not cooling properly?
- Solution: Check the thermostat settings and clean or replace the filters.
- Problem: Is the AC unit making unusual noises?
- Solution: Inspect it for loose parts and remove the dirt and debris.
- Problem: Is there water leakage?
- Solution: Ensure the drain hose is properly connected and doesn’t have any obstruction.
Call a Professional If:
For any complex issue before, during, or after the mini-split installation process, that you think you won’t be able to handle, call a professional to handle it effectively before the issue gets out of hand. A-One Technical is a trusted company that offers expert HVAC services at affordable rates, ensuring your AC unit remains in first-class condition for longer and operates smoothly.